

All my bangles start out from heavy gauge copper wire. I need to pull it apart and cut it to length.

A large pile of wire, cut to length ready to be filed and brought into a rough circle shape to be soldered.

Filed and brought into a rough circle shape ready for soldering.

Soldered wire, ready to be hammered round. This is now ready to be hammered into a proper bangle shape.

A nice little pile of bangles hammered into a bangle shape. Ready for texture hammers!

Bangles textured! These are now ready for patina’s. I have about 10 different patina styles and colors I choose from.

They might wind up looking like this after patina.

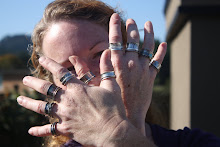
Or they might wind up looking like this! I really enjoy making these, there are various styles and patina's available in my Artfire shop.

4 comments:
Those are beautiful bangles. You make it look so easy. it must have taken eons to play with all that wire. Nicely done.
Is that electrical wire you're scavenging? If so, that rocks my socks. And so do your patinas.
Ohhh so beautiful. Thanks so much for the step by step. Do you use silver solder?
Can't wait to see you at Bead and Button.
Libby I can't wait to see you either, I hope to get more visiting in this year. I switch back and forth between silver and copper solder. The silver solder patina's better. Magpie it's bare copper wire I get at Home Depot, it's the only place that has it heavy enough.
Thanks for the compliments! I really am having fun with these.
Post a Comment